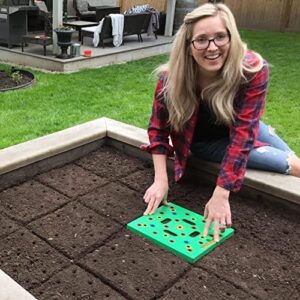
When it comes to gardening, there are a lot of options out there. You could plant directly into the ground, or you could create raised beds to make your gardening experience even better. Raised garden beds are a popular choice for many gardeners because they offer a number of benefits. They can help improve soil quality, prevent soil compaction, and make it easier to control weeds and pests.
If you’re thinking about building a raised garden bed for your outdoor space, you’ve come to the right place. In this article, we’ll walk you through the steps of building the perfect raised garden bed for your needs.
Step 1: Choose the Right Location
The first step in building a raised garden bed is choosing the right location. You’ll want to pick a spot that gets plenty of sunlight and is level. This will help your plants thrive and make it easier for you to work in the garden.
It’s also important to consider the size of your garden bed. Think about how much space you have available and how much you want to plant. You’ll want to make sure your raised bed is big enough to accommodate all of your plants.
Step 2: Gather Your Materials
Once you’ve chosen the perfect spot for your raised garden bed, it’s time to gather your materials. You’ll need some lumber, screws, a drill, a saw, and some landscaping fabric. You can choose from a variety of materials for your raised bed, including wood, metal, or concrete blocks. Just make sure the material you choose is durable and can withstand the elements.
Step 3: Build Your Raised Bed
Now that you have all of your materials, it’s time to start building your raised garden bed. Start by cutting your lumber to the desired size. You’ll want to create a rectangular shape that is at least 12 inches tall. This will give your plants plenty of room to grow.
Once you have your lumber cut, line them up and secure them together using screws. Make sure your corners are square to ensure a sturdy structure. You can also add a layer of landscaping fabric to help prevent weeds from growing in your raised bed.
Step 4: Fill Your Raised Bed
With your raised garden bed built, it’s time to fill it with soil. You’ll want to use a good quality potting mix that is rich in nutrients and well-draining. Fill your raised bed with soil up to the top, leaving some room for your plants to grow.
Step 5: Plant Your Garden
Now that your raised bed is filled with soil, it’s time to start planting. Choose a variety of plants that will thrive in your outdoor space. You can plant vegetables, flowers, herbs, or even succulents – the possibilities are endless.
Make sure to space your plants out according to their specific needs. Some plants will need more space to grow, while others can be planted closer together. Water your plants regularly and provide them with plenty of sunlight to ensure they thrive.
Step 6: Maintain Your Garden
Once your raised garden bed is built and planted, it’s important to maintain it regularly. Keep an eye on your plants and water them as needed. You may also need to add compost or fertilizer to keep your plants healthy and happy.
You’ll also want to keep an eye out for weeds and pests. Pull any weeds that pop up in your garden bed and take measures to prevent pests from damaging your plants. With a little bit of maintenance, your raised garden bed will flourish and provide you with a bountiful harvest.
In conclusion, building a raised garden bed for your outdoor space can be a fun and rewarding project. By following these steps, you can create the perfect raised bed for your needs and enjoy the benefits of gardening in a raised bed. Whether you’re a seasoned gardener or a beginner, a raised garden bed can help you grow healthy and beautiful plants in your backyard. So grab your tools and get started on building the perfect raised garden bed today!


